

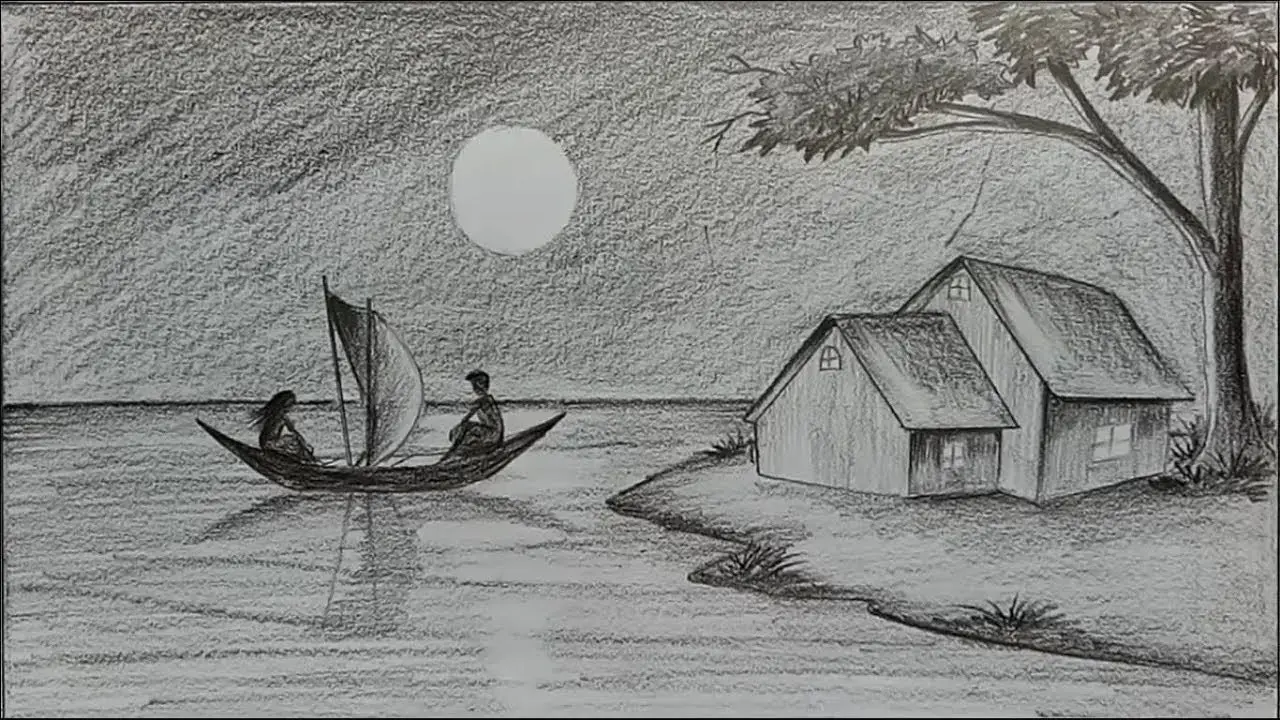
 A rough pencil sketch, a character doodle, or an architectural concept drawing can be the starting point for an animated video. With modern generative AI, creators can explore movement, lighting, and visual styles without rebuilding every scene in traditional animation software.
But there is a challenge: how do you add motion to a sketch without losing the original creative idea?
Many general-purpose AI video generators produce visually impressive results but can change the composition, character appearance, or drawing style. For artists and designers, this can be frustrating when the original sketch is supposed to guide the final result.
In this guide, we'll explore practical sketch-to-video workflows, share useful motion prompts, and look at how specialized AI tools can turn simple drawings into animated content.
1. Why Start With a Sketch Instead of a Text Prompt?
Text-to-video generation is useful for exploring ideas, but describing a precise composition entirely in words can be difficult.
Imagine you want to animate a hand-drawn fantasy scene featuring a dragon flying above a castle.
With text-to-video, you need to describe:
- The dragon's position and appearance
- The castle's placement
- The camera angle
- The landscape composition
- The desired animation style
- The movement of individual elements
Even a detailed prompt may not reproduce the exact arrangement you imagined.
Starting with a sketch changes the workflow.
Your drawing already communicates the composition, subject placement, pose, and perspective. The AI can use this visual reference to generate movement rather than inventing everything from scratch.
This makes sketch-based generation especially useful for storyboards, character concepts, product ideas, and architectural visualization.
2. Three Ways to Transform a Sketch With AI
Not every sketch needs the same type of transformation. There are three common creative workflows.
Workflow A: Sketch to Video
This approach converts a static sketch into a short animated scene.
For example:
Input: A pencil sketch of a modern living room.
Output: A cinematic video featuring a slow camera movement through the room, with natural lighting and subtle environmental motion.
This workflow is useful for:
- Architectural concept presentations
- Product design previews
- Storyboard visualization
- Creative pitches
- Animated concept art
One example is Sketch to Video AI, a browser-based platform designed specifically for turning drawings, storyboards, and concept sketches into animated videos.
Rather than relying entirely on text descriptions, creators upload a sketch and choose a visual style such as Realistic Video, Sketch Animation, or Illustration Video.
The original drawing serves as the starting point for the generated motion.
Workflow B: Animate a Drawing
Sometimes you don't want to transform a drawing into a realistic video. You simply want the original artwork to move.
For example:
- Make a cartoon character wave
- Animate a child's drawing of a dragon
- Make a hand-drawn cat blink
- Add gentle motion to an illustrated landscape
In these cases, preserving the original drawing style is often more important than producing cinematic realism.
A dedicated Animate a Drawing workflow lets creators work with existing artwork, choose motion behavior, and preserve the hand-drawn appearance.
This is especially useful for illustrators, educators, parents, and creators who want to bring personal artwork to life.
Workflow C: Sketch to Image
Animation isn't always the next step.
Sometimes a rough sketch needs to become a polished image before it is used in a presentation, marketing campaign, or animation project.
For example:
Input: A simple pencil drawing of a sneaker.
Output: A detailed product visualization with realistic materials, lighting, and textures.
With Sketch to Image AI, users can transform rough drawings into finished visuals using styles such as photorealistic rendering, illustration, anime, product visualization, and architectural rendering.
This creates another useful workflow:
Rough Sketch → Finished Image → Animated Concept
Instead of starting from a blank canvas every time, creators can develop multiple outputs from the same original idea.
3. How to Write Better Sketch-to-Video Prompts
A good motion prompt should describe what needs to move without unnecessarily redefining the entire image.
A practical structure is:
Subject + Action + Camera Motion + Style Constraints
Let's look at some examples.
Example 1: Animate a Character Drawing
Input: A hand-drawn cartoon character standing in the center of the image.
Prompt:
The character gently waves one hand and blinks naturally. Add subtle body movement while keeping the original hand-drawn illustration style. Maintain the character's proportions, colors, and facial features. Keep the camera stationary.
Why it works:
The prompt identifies the action and clearly instructs the model to preserve the original artwork.
Example 2: Turn an Architectural Sketch Into a Video
Input: A rough perspective sketch of a modern living room.
Prompt:
Slowly move the camera forward through the living room. Introduce soft natural sunlight through the windows and subtle realistic shadows. Preserve the original room layout, furniture placement, and camera perspective. Use a clean architectural visualization style.
Why it works:
The prompt focuses on camera movement, lighting, and composition rather than introducing unnecessary new objects.
Example 3: Animate a Fantasy Illustration
Input: A pencil sketch featuring a dragon above a mountain landscape.
Prompt:
Animate the dragon slowly flapping its wings while flying above the mountains. Add gentle cloud movement and subtle motion to the landscape. Preserve the original illustration composition and recognizable character design. Use smooth, natural animation.
Why it works:
It separates subject motion from environmental movement and avoids excessive camera effects.
Example 4: Create a Product Concept Animation
Input: A hand-drawn concept sketch of a futuristic desk lamp.
Prompt:
Create a smooth cinematic product reveal with a slow camera push-in. The lamp gradually illuminates with a warm glow. Preserve the product's original shape and proportions. Use realistic materials, controlled studio lighting, and minimal background movement.
Why it works:
The motion is simple, and the prompt emphasizes product consistency.
4. Common Mistakes When Animating Sketches
Even with capable AI models, some generation problems appear repeatedly.
Mistake 1: Asking for Too Much Motion
A prompt that combines camera rotation, running characters, changing lighting, and moving backgrounds can create inconsistent results.
Better approach: Start with one primary action and one optional secondary movement.
Mistake 2: Ignoring Style Consistency
If you upload a watercolor illustration but request a realistic cinematic scene, the AI may replace the original artistic style.
Better approach: Decide whether you want to preserve the drawing or deliberately transform it.
Mistake 3: Using Unclear Source Images
Very faint pencil lines, cluttered backgrounds, or overlapping shapes can make the subject difficult for the model to interpret.
Better approach:
- Use a clear, high-contrast sketch.
- Keep the main subject recognizable.
- Avoid unnecessary background clutter.
- Make important shapes and boundaries visible.
Mistake 4: Overcomplicating the Prompt
Long prompts aren't automatically better.
Instead of describing every detail already present in the drawing, concentrate on the motion.
For example:
Too vague:
Make this drawing awesome and cinematic.
More useful:
Slowly move the camera toward the castle while clouds drift across the sky. Preserve the original composition and illustration style.
5. A Practical Workflow for Creators
Here's a simple process for turning drawings into useful visual content.
Step 1: Prepare your sketch
Use a scanned drawing, digital sketch, or clear photograph of your artwork.
Step 2: Choose your creative goal
Do you want to:
- Animate the original drawing?
- Transform the sketch into a realistic video?
- Create a polished image before animation?
Choosing the correct workflow matters more than writing an extremely detailed prompt.
Step 3: Define the motion
Describe the main action in one or two sentences.
Step 4: Select the visual style
Choose whether to preserve the sketch, maintain an illustrated appearance, or explore realistic rendering.
Step 5: Generate and review
Check the output for:
- Subject consistency
- Composition preservation
- Smooth motion
- Unwanted visual changes
- Style consistency
Step 6: Refine one element at a time
If the camera moves too quickly, adjust



Top comments (0)